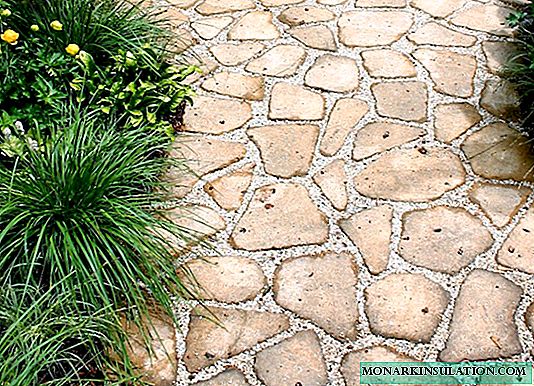
When planning the arrangement of garden paths on your personal plot, you always want to create functional and at the same time beautiful elements of landscape design. The material for garden paths can be wooden saw cuts, natural stone, gravel ... But still, the most popular among owners of suburban areas as pavement for pitches and paths is paving slabs with an attractive appearance and excellent quality characteristics. Do-it-yourself paving slabs will become an original addition to the design of the site, in harmony with the style of the house and garden.
What are the benefits of homemade tiles?
Do-it-yourself paving slabs production is quite laborious and quite long, but at the same time rather fascinating process. The result of the work are exclusive products that are successfully combined into picturesque paths.
Interesting ideas for decorating garden paths can be found in the material: //diz-cafe.com/dekor/sadovye-dorozhki-svoimi-rukami.html

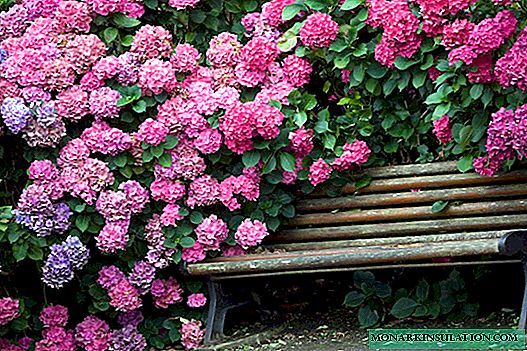
Such unusual paths serve as a worthy setting for flowering garden plants
In addition, the manufacture of paving slabs with their own hands will significantly save money in the family budget, because the purchase of finished coatings is many times more expensive.
Tiles made at home may not be suitable for covering sites that are designed to accommodate heavy structures or vehicles, but will be an excellent solution for pedestrian paths in the garden. With the correct manufacture of concrete mixture and exposure to all stages of the production technology, you can get a product with 100% durability.

Using colors and pigment dyes, you can create tiles of various colors
By experimenting and coloring solutions using tinting, you can get incredible combinations and patterns. The very process of making and arranging tracks is an interesting lesson that allows you to unleash the creative potential that brings a lot of pleasure and positive.
Step-by-step manufacturing process
Choosing materials and tools
In order to make the original paving tiles with your own hands, first of all, you need to purchase the material of manufacture and stock up with the necessary tools. The tile is created on the basis of a mixture of cement, sand and water with maintaining proportions that depend on the purpose of the product and the brand of cement used. For the manufacture of durable garden paving tiles, it is advisable to use cement grade M 500. It is not worth saving on the quality of the material, so as not to stumble on the crumbling path later.
Sand and water for mortar should be cleaned of dirt and foliage. It is not scary if small pebbles are present in the sand. The quality of concrete will not suffer from their presence. But the product will acquire an unusual texture.
Advice! With the help of plasticizers, you can increase the strength of paving slabs and its resistance to temperature changes.
A wide range of plastic molds are available in specialized stores. They can have completely different shapes and sizes. Each of them is designed for 200 fillings. To speed up the manufacturing process, it is advisable to purchase ten pieces of each type of mold.

By combining 2-3 configurations of the product, you can create unusual ornaments and fancy "snakes"
It is also possible to use plastic containers for food products as molds, which have sufficient flexibility, softness and durability. Using containers of simple shapes with even sides and right angles, you can make rectangular "bricks".
And you can also make a fill mold yourself, read about it: //diz-cafe.com/dekor/forma-dlya-zalivki-sadovyx-dorozhek.html

Such tiles when stacking easily dock with each other
Solution preparation
The necessary components are ready, we can safely begin to make exclusive paving tiles with our own hands. Mixing the sand-cement mixture can be done either manually or using a perforator having a mixer nozzle. When planning to create coatings in the tens or even hundreds of tiles, it is advisable to stock up on a concrete mixer to facilitate the process. Well, if it is already in the host arsenal. Indeed, such construction equipment can be used for many purposes, ranging from concreting the channel of a stream in the garden to completing the repair of fence posts.

1 part of cement and 3 parts of sand are poured into a container, which can be used as a basin or bucket
Kneading the solution in a concrete mixer to obtain a homogeneous mass, first you need to fill up the sand, and then cement is poured into the continuously rotating container.
Add water to the mixture gradually, without ceasing to mix the solution. Exceeding the amount of water in the solution can lead to a decrease in the strength of the finished concrete. To prevent this, at the mixing and pouring stage, water-repellent additives and reinforcing fiber are added to the solution.

The consistency of the solution should be pasty: a little liquid, but not sliding off the trowel
You can paint tiles in the most unusual colors with the help of inorganic pigments, which have increased resistance to light and atmospheric phenomena, as well as alkaline environment. The amount of dye for the solution is selected by the "sample method", starting from 30-50 g and gradually increasing the proportion. The composition acquires a uniform color after 5-7 minutes. The readiness of the composition is determined by the absence of lumps and uniform coloring of the entire volume of material.
Mold fill
Before pouring the mold, it is advisable to lubricate with emulsol or any oil (you can even use waste machine oil). This will subsequently facilitate the decomposition of the frozen product.

Molds are filled with mortar and tamped with a trowel
You can increase the strength of the product by laying a metal mesh, rod or wire in half-filled concrete form, and then adding it to the edges with the remaining solution.
In order to condense the cement mass and expel excess air bubbles from the solution, it is necessary to create concrete vibration. For these purposes, a vibrating table is used. In the absence of such a design, an alternative to it can serve as a rack or shelf. To create vibration, it is enough to perform a few taps with a mallet on the table.
To simulate natural stone, wood, brick or other relief coatings, decorative concrete can be used. More about this: //diz-cafe.com/dekor/dekorativnyj-beton.html
Drying and removal of products from containers
The molds poured with concrete are covered with plastic wrap and aged 2-3 days. During this period, it is important to maintain a sufficient level of moisture. To do this, it is advisable to periodically wet the hardening products.

The place where the workpieces dry should be hidden from direct sunlight.
After 2-3 days after casting, the tiles can be molded by slightly pushing the sides and shaking. Drain the product in the shade for another 3-4 weeks. During this time, the tile will gain sufficient strength, and it can be used as a coating for garden paths and recreation areas.