Traditional versions of mailboxes for receiving correspondence are rarely very original. Familiar blue metal boxes decorated with miniature padlocks may perhaps satisfy the unpretentious taste of their owner, but the eye of the creative owner will probably consider in them a fertile basis for creating an original exterior item. Ideas on how to make a mailbox can be borrowed from neighbors whose fences adorn the original and at the same time functional containers, or you can take as a basis the arrangement options described in our article.
What are all mailboxes?
When planning to make a mailbox for a private house, which will serve not only for its intended purpose, but also act as a harmonious addition to the architectural ensemble of a suburban area, you should first determine its shape and size. According to the execution style, mailboxes for receiving correspondence can be divided into three main types.
Option # 1 - a traditional box
The mailbox for receiving correspondence is most often placed near the central entrance to the site, hanging on the wall of the house, a gate or a fence. The originally designed exterior element will always attract the attention of passers-by and guests.
The mailboxes familiar to many of us, which have become widespread in the former Soviet Union, are vertically placed boxes with an equipped slot for letters and newspapers
Option # 2 - in the English manner
The mailbox, made in the form of a table, is installed directly on the ground, placing it a few steps to the main entrance.

Functional designs that look like a miniature house are most often made of durable metal or laid out of brick
Option # 3 - an American-style box
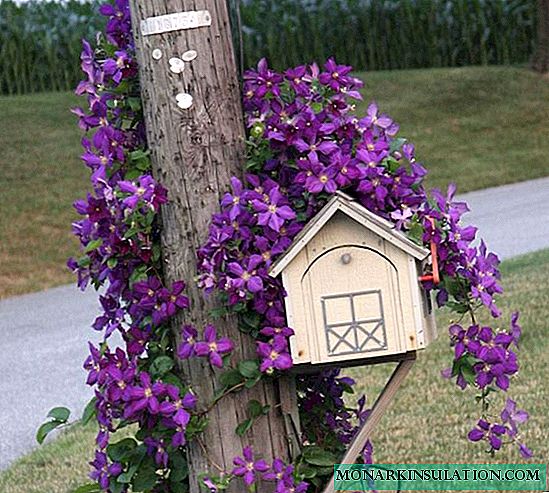
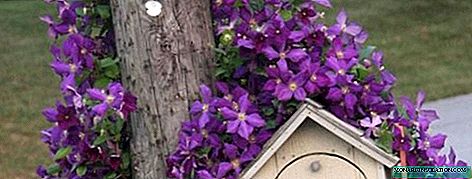
Such boxes are installed on a separate support, in the role of which is a metal or wooden rod, or a decorative figure. Boxes are most often equipped with a special flag, which is raised by the owner if there are letters in the box that the postman must pick up and send on his own.
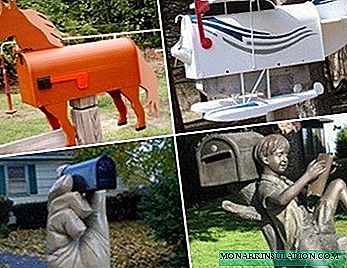
The design of the drawers for receiving letters and American-style magazines is the same type - horizontally placed containers with a semicircular roof and side doors. But their decorative design is often amazing

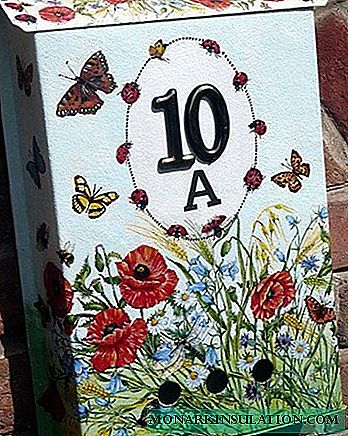
All kinds of household items can serve as the basis for creating boxes decorated in an unusual design solution.
General guidelines for making letterboxes
When planning to make a functional construction with your own hands, each owner wants her to serve more than one season without losing her attractiveness for as long as possible. Therefore, when creating a durable mailbox, you should adhere to a number of basic recommendations:
- It is desirable to equip a visor above the slot for lowering correspondence, which will protect the contents of the container from falling with a drop of rain and snow.
- The door for the removal of letters can be placed both on the front panel and in the bottom wall of the structure. In the first version of the arrangement, it is important to accurately calculate the dimensions of the holes and doors in order to prevent the formation of cracks through which moisture will enter. When planning to place the door in the bottom wall, it is better to make this whole part of the drawer folding.
- When constructing a wooden box, all structural elements are best fastened using corners. This will increase the strength of the structure and greatly facilitate the repair in the future.
- Do not forget to provide a lock, the installation of which will prevent possible attacks by thieves on correspondence.
Some craftsmen equip their mailboxes with a simple alarm system. It is driven by contact plates, which can be taken from an old magnetic relay or telephone switch.
To equip the mailbox with an alarm system, an additional bottom must be made in the container, which can be cut out of plywood or plastic, and then placed on springs.
An additional bottom is placed in such a way that the lower edge is attached directly to the box, and the upper one is supported by springs, between which contacts are placed that respond to filling the correspondence box
As soon as the contacts are closed, the light bulb connected to them, which is already installed in the house, lights up and thereby signals the receipt of new correspondence.
Master class # 1: designer cardboard box

A chic mail box decorated with elegant lace and outwardly resembling a dollhouse can make a bright accent in the exterior of a country house
To make such a nice "house" we need:
- Cardboard for modeling (4 mm thick);
- Lock for drawer;
- PVA construction glue (or hot with the thermogun);
- Paper tape and stationery knife.
We will decorate the box with napkins for decoupage, as well as acrylic paints in white, black and silver.
We apply the template to a sheet of cardboard, transfer the dimensions of all the details of the structure, and then cut them with a knife

In the manufacture of the window, it is important not to cut the cardboard to the end, this will prevent tears. It is advisable to fix the bending points with paper tape

We glue all the details of the box with hot melt adhesive or building PVA, leave the box until completely dry
The box is ready, proceed to clearance.

To create a visual effect of antiquity, paste the outer surface of the box with napkins, and then cover with black and white paint, finishing the corners with a silver tint

It remains only to install a miniature lock on the door, stick the selected napkins for decoupage and decorate the roof with lace tape
The original designer box, made by yourself, will become a memorable business card of any suburban area.
Master Class # 2: Plywood Mailbox Option
In addition to the cardboard version, you can make something more durable. For example a wooden box.

A nice wooden mailbox will fit perfectly into the countryside: outwardly resembling an impromptu birdhouse, it will become an appropriate addition to the exterior
To make such a mailbox you will need materials:
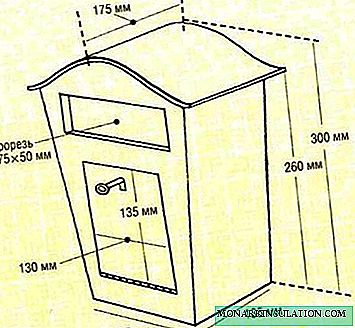
- Pine beam 1000x75x50 mm;
- A cut of plywood 650x435 mm 9 mm thick;
- Thin plywood sheet measuring 650x650 mm;
- 130 mm piano loop (stainless steel) and mortise lock.
Of the tools you will need:
- Jigsaw;
- Glue for woodwork;
- Nails or screws;
- Sandpaper.
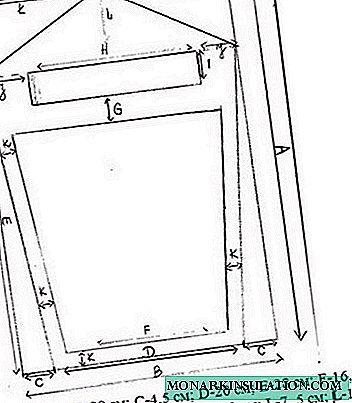
We cut the wooden beam across into three parts, each 330 mm long. On each of the cuts, we outline the central and transverse lines, maintaining a distance between them of 300 mm. Using the patterns, draw a curve along the outlined contours, along which we subsequently cut the bend. On all three workpieces, we carefully clean the edge, and then glue them together.
From sheets of thin plywood, 8 identical preforms with a size of 320x160 mm should be obtained. To prevent gaps in the structure before gluing the parts, you just need to first attach the elements to each other and check whether they match. We lay out the layers in layers on the concave side of the block, carefully coating each layer with glue. After the glue has completely dried, the roof can only be gently sanded and attached to the box using the same glue.
According to the scheme with the specified dimensions, carefully cut the remaining parts for the mailbox from plywood sheets
In the front wall of the box we cut an opening for the door and a slot for throwing in correspondence. We beat or fasten the piano loop to the door, and also cut out the keyhole to equip the castle. After installing the door, carefully clean the entire box, and then cover it with a layer of paint or varnish.