Flowering plants are always appreciated by flower growers and are favorite guests in our homes. Their beauty pleases the eye, gives a unique look to the home and creates coziness. Basically, these are tropical plants that are easily mastered by us. They are surprisingly unpretentious and easily breed. For example, the mysterious gloxinia.
Gloxinia Description
Gloxinia is a southern guest, she arrived on our windowsills from hot Brazil. This beauty belongs to the genus Gesneriaceae, to tuberous plants.
The flower is relatively unpretentious in care. Gloxinia is very photophilous, but does not tolerate direct sunlight, which can cause burns, and for watering with warm water and loose, light soil will be grateful. Water the flower with settled water, without falling into the center of the tuber and in the axils of the leaves. Waterlogging should not be allowed.
Gloxinia should be protected from drafts to avoid the appearance of unwanted flower diseases.
Gloxinia blooms from mid-March to October. Following this period comes peace. It is then that the plant begins to shed its leaves, which first turn yellow, then dry and fall. You can leave the tuber in the ground and put the plant in a cool (+12 ° C), dark place (without access to light), moistening the soil slightly once a month. It is permissible to remove the tuber and put it in sawdust, store at a temperature of 8-13 ° C.
As soon as the kidneys appear, the tuber is washed in running water, examined for the presence of diseases, if necessary, treated with a fungicide, dried for about an hour and planted in a prepared substrate. Suitable soil for violets, pre-moistened.
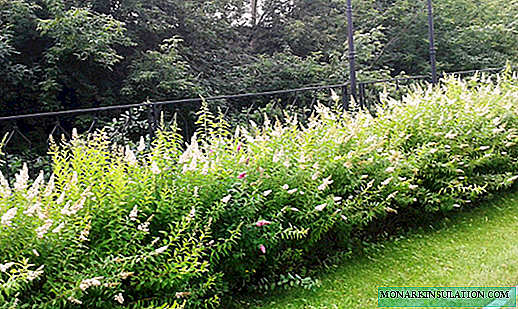
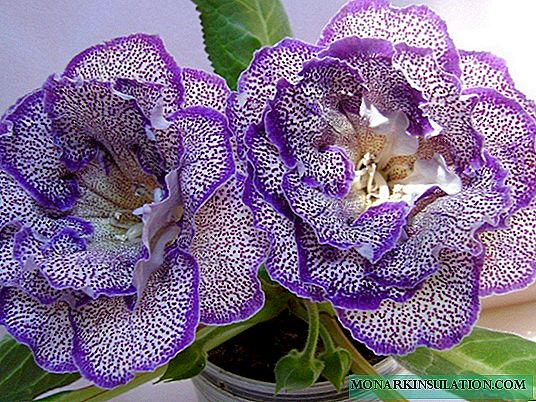
Photo Gallery: Beauty - Gloxinia
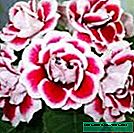
- A guest from Brazil confidently took her place on our windowsills


- Southern beauty gloxinia does not tolerate drafts

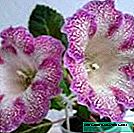
- Gloxinia - an unpretentious, beautifully flowering plant

Young shoots of gloxinia, obtained several months ago in the process of reproduction, are not sent to rest - they are obliged to gain strength and grow tubers.
The flower bowl should be shallow and wide, since the roots of gloxinia are superficial. We must not forget about the drainage height of 2-3 cm.
This beautiful plant reproduces surprisingly easily, which makes it easy to get new young flowers.
How to properly propagate and plant gloxinia at home
There are several ways to breed gloxinia, each of which is appropriate to apply depending on the condition of the flower and the availability of time during which it is planned to obtain young plants.
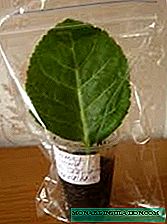
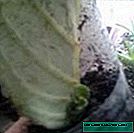
Propagation by leaf cuttings
The gloxinia propagation material is taken during the bud formation period. These should be large, healthy, green leaves, the length of the stalk of which is about 3 cm.
First way
- The leaf is cut with a sharp blade and placed in a glass with settled water at room temperature.

The mother sheet is immersed in a glass of water until the roots appear.
- The leaves give roots in about three weeks.

Leaves with roots are planted in light soil for the further development of plants.
- Then a leaf is planted in a peat tablet or in a small bowl with prepared soil, as for adult plants, watered, cover the container with a plastic bag and put in the brightest place, but not in direct sunlight. Airing and watering the flower is not necessary.
The mini-greenhouse is placed in a warm, bright place and is not opened until young shoots appear.
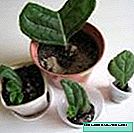
- After about one and a half to two months from the maternal leaf, babies will appear. Cellophane is removed, and the children are separated, seating them in separate pots.

Young shoots of gloxinia can bloom 10 months after their appearance


Even if the children do not have nodules, they should still be planted in separate bowls: after a while they will take root, their own tubers will appear.
Sometimes the appearance of daughter shoots has to wait a long time. What is the reason is unknown. To speed up the process, it is necessary to pinch the sheet so that approximately 2 cm is left from the ground to the top.
Second way
This is a simplified version of the first method. The cut sheet is immediately placed in a cup with ready-made, moistened soil. The container is covered with cellophane and also put in the brightest, warmest, most protected from drafts place. After a while, the leaf will take root, then the children will appear.

The gloxinia leaf is well established in the soil without prior rooting.
Leaf Fragmentation
The size and health of the future maternal leaf gloxinia allow you to get offspring by dividing the leaf into segments.
- Each part is planted in a separate container with moistened soil, cellophane is put on top, the bowl is placed in a bright place.
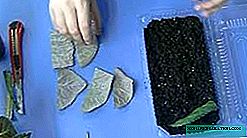
Each segment of gloxinia leaf is able to give a healthy young shoot.
- The plant does not need watering and ventilation. Children are formed from the widest vein in at least two months. After that, the covering material should be removed, and the young plant should be watered. A mother leaf that fades over time needs to be removed.
Photo gallery: gloxinia propagation by leaf fragment
- Babies appear after about two months

- Leaf segments readily grow in soaked peat tablets
- Fragments of a gloxinia leaf are immediately planted in a prepared substrate and covered with a film


Video: recommendations for the cultivation of gloxinia using leaf cuttings and (or) fragments
Seed propagation
It is easy to grow gloxinia from seeds, following some general recommendations. Sowing material can be obtained both independently, pollinating your home flower manually, or purchased in a store (especially varietal flowers).
How to pollinate gloxinia and get seeds at home
For this procedure, it is best to take flowering gloxinia of different varieties. The pollen of one plant pollinates the pestle of another. Soon the pestle will fade, gloxinia will fade, the seed box will ripen within 7-8 weeks. Then it will open. At this point, the box is cut off and placed in a container with the open edge down for ripening. Ready gloxinia seeds are brown.
Video: pollination of gloxinia at home and seed collection
Photo gallery: pollination and maturation of gloxinia seeds
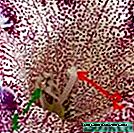
- Pollination of a plant is best done with material taken from a flower of another variety

- When gloxinia fades, seed bolls form

- Seed box cracking as it ripens


- Gloxinia seeds are very small grains of brown color

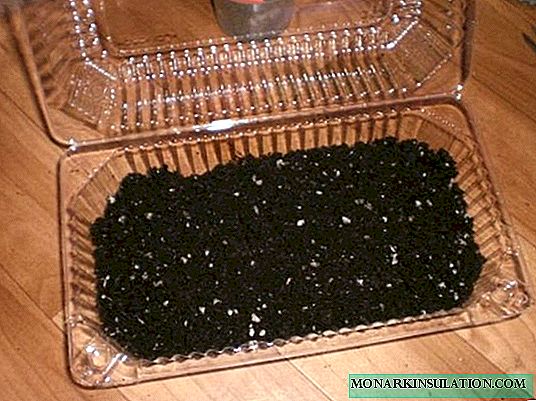
For sowing, the end of February - the beginning of March is suitable, when daylight hours quickly increase in duration. It will take a mini-hotbed or a wide, shallow capacity, cellophane, ready-made soil for flower crops (light). To get healthy shoots, you need to do this:
- The soil is pre-moistened with a solution of potassium permanganate in order to protect seeds, and subsequently - young shoots.

Before sowing, the soil is treated with a weak solution of potassium permanganate.
- Seeds are neatly distributed throughout the soil tank.
- Then the greenhouse lid is tightly closed or cellophane is put on top. The bowl is placed in a warm place.
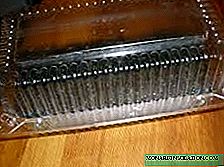
- After about a week and a half shoots will appear. You can open the greenhouse, rearrange it in the brightest place. Keep away from direct sunlight to avoid burns and death of young seedlings.
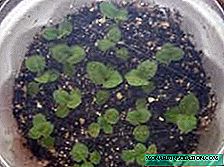
Shoots appear together in one and a half - two weeks after sowing
- In a month and a half after the emergence of seedlings, they pick, carefully replacing fragile plants from the total capacity in separate shallow glasses.
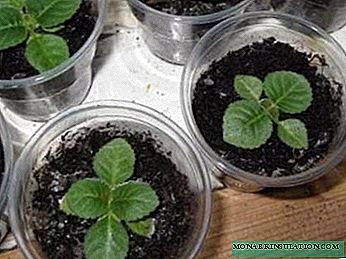
Transplanted plants feel good in a warm, very bright place.


Video: gloxinia grown from seeds
Peduncle propagation
It happens similarly to the methods described above.
- With a sharp blade, a flower stalk about four centimeters long is cut off from a faded plant and immersed in a glass filled with water by only 1 cm.

Peduncle gloxinia is used for propagation after flowering plants
- After the roots appear, the plants are transferred to a container with a ready-made substrate, covered with a film and placed in the light. The appeared children (about a month later) are seated in separate dishes.

Maternal peduncle babies appear a month after rooting


Tuber propagation
This is perhaps the most risky way to breed gloxinia. One wrong move, and you can lose the whole plant.
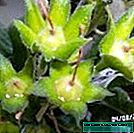
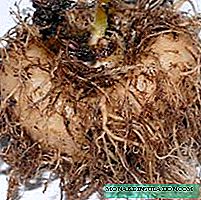
The procedure is carried out after a period of rest, only when kidneys appear on the tuber.
- With a sharp knife, previously disinfected with alcohol, the tuber is cut so that at least one growth point is located on each part.

Gloxinia tuber division is carried out when the kidneys appeared on it
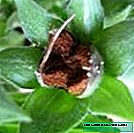
- Slices are powdered with crushed activated carbon and planted in transparent cups with prepared soil, placed in the brightest place and constantly monitor the appearance of roots and the state of the nodule. It is better to water through the pan. It is necessary to be afraid of overmoistening of the earth: a tuber - a divide can quickly rot.
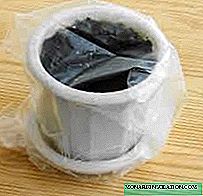
Tuber - the divide is planted in a separate bowl or cup
- Young plants are transplanted after the roots braid the entire soil lump in a glass.
The reason for the tuber transplant - the roots braided the entire earthen lump


Video: gloxinia tuber division
Problems encountered during the reproduction of gloxinia
But sometimes it’s not even very whimsical gloxinia that can be propagated: the uterine leaves wither, the peduncles and tubers rot. There is always a reason.

The reason for the unsuccessful attempt to breed gloxinia lies in the failure to follow simple rules.
- The peduncle or leaf was not cut off with a sterile instrument, but simply torn off from the plant. In no case should you do this! Wipe the blade with an alcohol solution.
- Direct sunlight. They are detrimental to gloxinia, cause burns on the leaves. From 11 to 16 hours every day the plant must be shaded with a transparent fabric (curtains).
- Heavy soil. The substrate for the flower should be loose, light, passing water and air (the prepared soil for violets is ideal). It is necessary to change the ground.
- There is no drainage. This moment should not be omitted. It is drainage that helps to remove excess moisture, thereby preventing root decay. It is necessary to transplant the plant into a substrate with vermiculite.
- Excessive moisture. Be sure to adjust the irrigation mode, according to the recommendations, to prevent stagnation of water in the bowl.
- Lack of light. Rearrange the plant to the brightest place, in winter, provide additional illumination with the help of lamps.
- Too high or too low temperature. Optimal: 23-25 ° C. Provide recommended air temperature.
- Non-sanitized soil brought from the street (greenhouses), which can be infected or populated by pests. Only use special primer purchased at the store. Brought soil should be treated with insecticides and fungicides according to the instructions.
- The tuber is divided incorrectly or infected. With this method of reproduction, you must strictly follow the recommendations.
How to save young plants and tubers
- The mother leaf, its fragment or peduncle has rotted or died. Unfortunately, there is no way to save him. It is necessary to determine the cause of the above and take new material for the propagation of the flower.
- Young shoots wither. Inspect them. If the nodules are healthy, there are roots, then transplant them into another container, having previously disinfected the soil with a solution of potassium permanganate. If the underground part of the plant has decayed, cut off the rotted area with a sharp blade (when the lesion area is small), powder with activated carbon and plant in a new substrate. With extensive rotting of the stem and roots, the young shoot is more appropriate to dispose of.
- Seeds do not germinate. You always need to control the expiration dates of the seed, and when planting, you can not fill the seeds with earth!
- Tubers and dividers rot. You should get a tuber from the ground, inspect. Cut the rotted areas with a disinfected sharp blade, it is best to treat the wounds with garden var. If mold is observed on the tuber, rinse in running water and place for two hours in a solution of any fungicide (dilute according to instructions). Then get it, dry it for an hour, plant it in fresh soil mixture.
Gloxinia is one of the rare species of flowering plants that have minimal maintenance requirements and make it easy to obtain new beautiful offspring, only observing simple rules and recommendations.